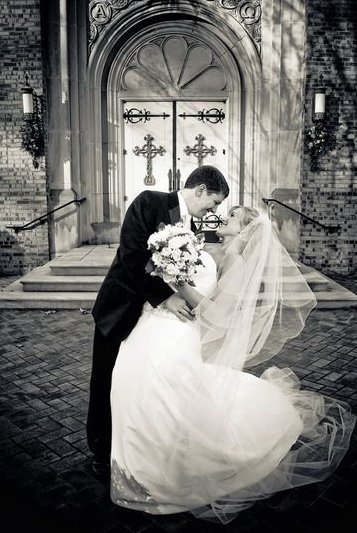
…daniel and april

…daniel and april

Tuesday, December 6, 2011

Pesto Stuffed Chicken Shells.

Thanks to What's Cooking Chicago? Blog.....
www.joelens.blogspot.com
we had a delicious easy dinner!! 
We both love pasta, chicken, and pesto so this was perfect for us!

Cook the jumbo pasta shells and set out
Fill the pasta shells and sprinkle cheese on them
 Bake and enjoy!! 
 YUM!

Pesto Chicken Stuffed Shells
original Joelen recipe

12-16 jumbo pasta shells
water for boiling pasta
4oz cream cheese, softened
1 cup freshly grated Parmesan or Asiago cheese + 1/4 cup for topping
3 tablespoons prepared pesto (homemade or store bought)
2 cups shredded cooked chicken
2 cloves garlic, minced
salt and pepper to taste

In a large pot over high heat, boil water and prepare pasta shells as directed on package. Cook pasta shells only until al dente. The pasta will finish cooking when the dish is baked. Drain the pasta shells and set aside.

In a large bowl, combine the rest of the ingredients, except the 1/4 cup of cheese for the topping. Fill the pasta shells with the filling and place in a baking dish.  Sprinkle the remaining 1/4 cup of cheese over filled shells.

Preheat oven to 350 degrees and bake shells uncovered for 30 minutes or until shells are bubbling hot and cheese melts.

Enjoy! :) 

Monday, December 5, 2011

Angel food cake, strawberries, and chocolate.

I was in charge of bringing something sweet to a meeting at school, but I wanted it to be a little healthy so I decided to make these fruit kabobs. 

Angel food cake, strawberries, and chocolate...YUM! 


They were delicious!

Sunday, November 27, 2011

Cork letter

Pinterest has struck again...
 This was one of the first DIY projects I saw when I became addicted to Pinterest and I finally decided to make it! Daniel's aunt and uncle collect corks and gave us a huge bag filled with them!!
All you need is wine corks, hot glue, and a wooden letter.
Hot glue the corks to the letter however you want. You can cut the corks if you want them to fit perfectly but I just made them fit the best I could!

I put it on the shelf in our kitchen!


Hope you make one!

Thursday, November 17, 2011

ONE WEEK!!!

In ONE WEEK from today I will be here...
watching this...
I am SOOOO EXCITED!!  Jana and I (and our wonderful husbands) are going as chaperons (we call ourselves the SHOPerons) with the Homewood High School Marching Band!
~~~~~~~~~~~~~~~~~~~~~~~~~~~~~~~~~~~~~~~~~~~~~~~~~~~~~~~~~~~~~~
While we are in NYC Daniel and I will celebrate our 3 year wedding anniversary on Tuesday, November 22nd. 
Here are some pictures from our wedding day...
so handsome :) 

 seeing each other for the first time... I will never forget this moment
 Outside of our beautiful church
Another moment I will never forget...
my sweet daddy walking me down the aisle
 First Dance...


 I am very blessed to have spent the last 3 years married to my best friend and look forward to spending many many more with him. He is loving, caring, patient, giving, supportive, and makes me laugh everyday. I am so thankful for him and that I have someone to share all of my dreams and adventures with.  

and thanks to him...and his early anniversary gift to me... I will have these to wear in New York!!!
in the tan color :) :) 

*sigh* i.love.them.

Wednesday, November 16, 2011

Peanut Butter Brownie Cups

I made these Peanut Butter Brownie Cups last week and they were amazing!! 

Ingredients
 After you make the brownies in mini muffin tins...hopefully the center will fall in while they are cooling, but if not then just press down in the center with the back of a teaspoon. 
 After you melt some peanut butter, put a little spoonful in the center of each brownie.
 Sprinkle some chocolate chips and peanut butter chips on top of the peanut butter


Ingredients:
1 box of your favorite brownie mix
1/2 cup peanut butter chips
1/2 cup semi-sweet chocolate chips
3/4 cup creamy peanut butter

Preheat oven to 350 degrees. Spray or grease about 40 mini-muffin cups.

Prepare boxed brownie mix as directed. Spoon batter evenly into muffin cups (about 1 heaping teaspoon). Bake for 13-15 minutes or until top is set and a toothpick inserted into center comes out slightly wet. After brownies are out of the oven, wait for centers to fall. This will happen upon cooling. If not then tap the centers with the back of a teaspoon to make a hole for the peanut butter.

Place peanut butter in a small microwave-safe bowl. Microwave on high for 45 seconds then stir. While brownies are still warm spoon about half a teaspoon of peanut butter into the center of each brownie. Top with semi-sweet chocolate chips and peanut butter chips. Cool completely in pan.

Enjoy!

Sunday, November 13, 2011

Allie and Wesley's Engagement Party

Two weekends ago we celebrated Allie (Daniel's sister) and Wesley's Engagement!!

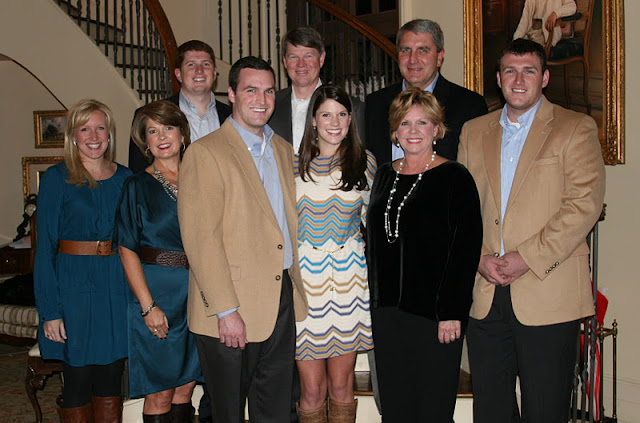
The McKinney's and Burkett's (minus James, Wesley's little brother)


The Happy Couple :) 
 Mexican themed party... it was so fun!

Loved this! 

Tuesday, November 8, 2011

Yummy.

Here are some things that I have made lately and loved!

This is a weight watcher recipe - Pecan crusted Chicken
Dip the chicken in nonfat buttermilk and roll in breadcrumbs and pecans
It was a delicious, fast and easy dinner!

SO... I have found my new favorite thing in life!!  CROCK POT BAGS! We LOVE the crock pot and I would cook in it every day...but I hate cleaning it out. So we discovered these bags and once you are done, just pick up the bag and throw it away...*sigh* so wonderful!


One of our favorite things to eat lately has been a wedge salad... we had one the other night with grilled salmon :)  We use the Publix Creamy Parmesan dressing instead of blue cheese dressing and it's amazing!

Made these cream cheese sausage balls from  http://www.plainchicken.com/ blog and they were amazing! 

Enjoy.
And go purchase those crock pot bags!!!! They will change your life :)

Thursday, October 27, 2011

Candy Corn Halloween decoration

A few weeks ago I decided I wanted a new Halloween decoration for my front door. I have seen so many of those really cute burlap decorations out in stores but knew the husband would not be happy if I bought one :) So I decided to make one and thought the candy corn would be the easiest!
I really love how the final product turned out!!

Cut out a candy corn shape from burlap... I laid 2 pieces of burlap on top of each other so I had 2 separate ones. Then paint the burlap - both pieces so the front and back will be painted (after I painted it I realized spray paint might have been a better idea)

I put some light orange polka dots in the middle section

Then write/paint Happy Halloween or whatever you would like on the candy corn
~I wrote mine with black paint pen then went over it with paint
Then I took the other burlap piece that was painted but not written on and hot glued it to the back (so when we are inside we see a painted candy corn)
I sprayed mine with an acrylic weather proof spray to keep it protected.
I decided to hang mine with wire...it went through the burlap really easy 

Final Product!! 

Happy Halloween :)

Sunday, October 23, 2011

Pinterest Ideas...

I LOVE FALL!!!! The leaves turning colors, the weather is amazing, football season, the start to so many great holidays, mine and Daniel's wedding anniversary! I am obsessed with this time of year. Well...as it turns out...I'm also obsessed with Pinterest. I did several things this fall/Halloween that I found on pinterest. Here are some of them!


Pumpkins on candlesticks...love this!


Stacked pumpkins :) 


In case you did not gather... I really like pumpkins :)